|
|
I mentioned above there is an exceptional case when headerless data can be stored on a DEVIL floppy disk. This is the case of one or more consecutive headerless data blocks having a Flag byte of $FF and immediately following a standard data block (Program or Code). In this case, the headerless data is stored immediately after the end of data in that standard block (if the standard block data occupies less than an exact multiple of 9 KB, then the headerless data will be stored starting with the first unused data byte in the last track occupied by the data in the standard data block). |
0 OK, 0:1.
ERASE "filename", where filename is the name of a data block stored on disk and the double quotes must be included.
"A:"), its execution listing on the screen the contents of the disk in the first physical drive detected as READY. In other words, if physical disk drives 0, 1 and 2 are present, and both drives 2 and 3 each have a disk inserted and are READY, the CAT command will list the contents of the disk in physical drive 2. If there is also a disk inserted in physical drive 0 which is READY, then the contents of the disk in drive 0 will be listed.
|
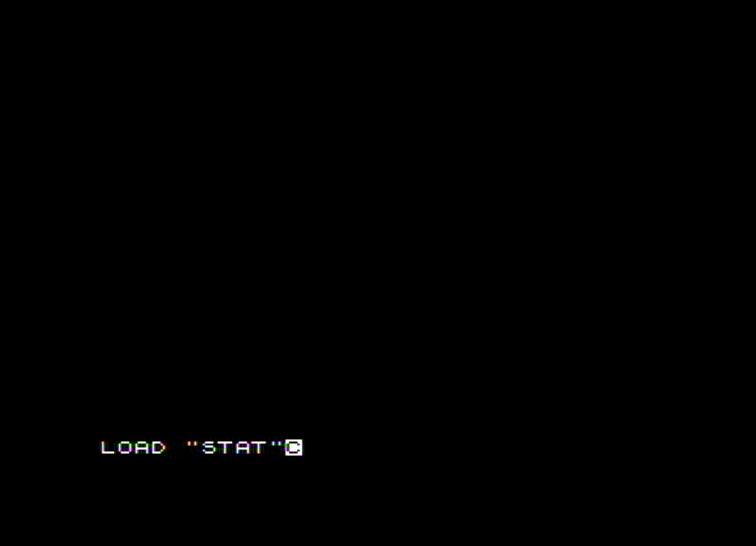
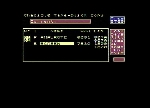
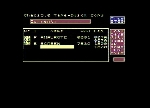
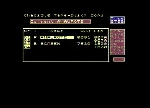
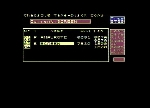
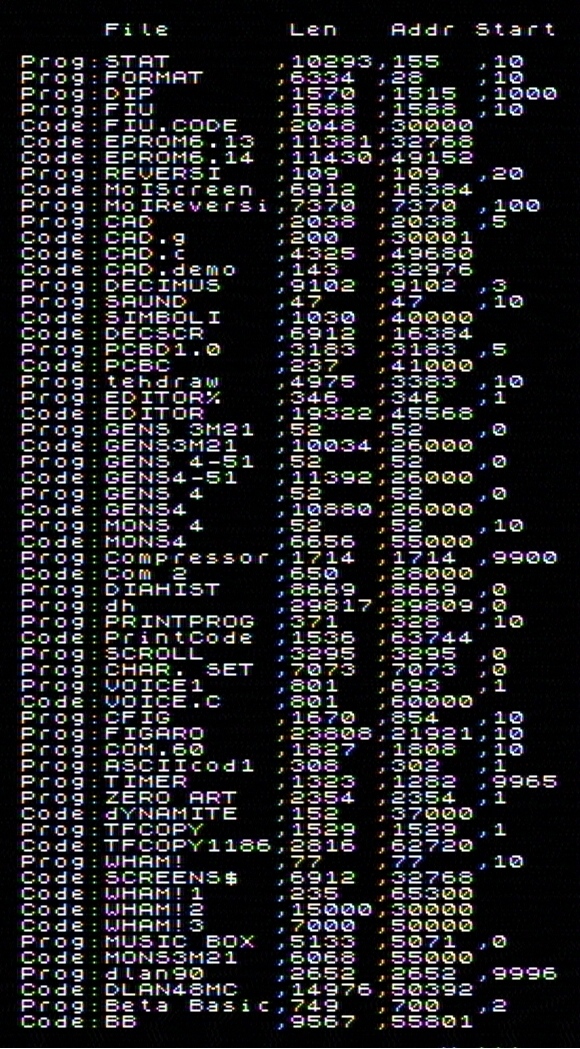
STAT - UTILITY TO MANIPULATE FILES (DATA BLOCKS) AND FILE ATTRIBUTES | ||
|
||
DIP - UTILITY TO COPY DATA BLOCKS BETWEEN DIFFERENT FLOPPY DISKS | ||
|
||
FIU - UTILITY TO COPY FILES FROM MAGNETIC TAPE TO DISK | ||
|
||
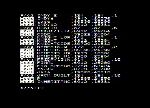
Floppy image | Contents | SAMdisk scan | |
| GAMES1.TDO | Disk STATistics | ||
| GAMES2.TDO | Disk STATistics | ||
| GAMES3.TDO | Disk STATistics | ||
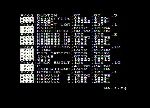
Floppy image | Contents | SAMdisk scan | |
| UTILS1.TDO | Disk STATistics | ||
| UTILS2.TDO | Disk STATistics | ||
| UTILS3.TDO | Disk STATistics | ||
Floppy image | Contents | SAMdisk scan | |
| DISK_1D.TDO | Disk STATistics | ||
| DISK_2D.TDO | Disk STATistics | ||
| DISK_3D.TDO | Disk STATistics | ||
Floppy image | Contents | SAMdisk scan | |
| DISK_D0.TDO | Disk STATistics | ||
| DISK_D1.TDO | Disk STATistics | ||
| DISK_D2.TDO | Disk STATistics | ||
* * *
Bash script for conversion from Teledisk image to RAW image (TD02RAW)I recommend using it together with the hexdumptxt2bin executable described below (saved in the same directory with this script) |
SYNTAX: TD02RAW TD0_image [start_track [end_track]] NOTE: 1. TD0_imageis the name of a Teledisk image WITHOUT the .TD0 extension (which must be present in the file name though). 2. start_trackis the number of the first track to extract from the Teledisk image. 3. end_trackis the number of the last track to extract. If the first track extracted has a number (n) greater than 0, tracks 0 to n-1 will be generated in the RAW image filled with the $E5 byte (formatted). If start_track and end_track are not specified, they will be assumed to be start_track = 0 and end_track = 79. So, for normal cases, executing the script with no parameters after the Teledisk file name is just enough. EXAMPLE: To extract data from the Teledisk DEVIL floppy image GAMES1.TD0 (720K, 80 tracks) the command used must be: TD02RAW GAMES1 and tracks 80-81 in the Teledisk image will be excluded from the RAW image being generated. |
Linux utility written in Standard C for text-to-binary conversion (hexdumptxt2bin.c) |
| The downloadable .ZIP archive contains the C source presented below, the statically built executable (should run with no problems in any Linux distro other than mine) and the compilation log (contains the actual command used for compilation and compiler messages) SYNTAX: hexdumptxt2bin filename.hexdump NOTE: The text file name supplied as parameter must have the .hexdump extension. The resulted binary file is saved as "filename.bin" |
* * *
NOTE:
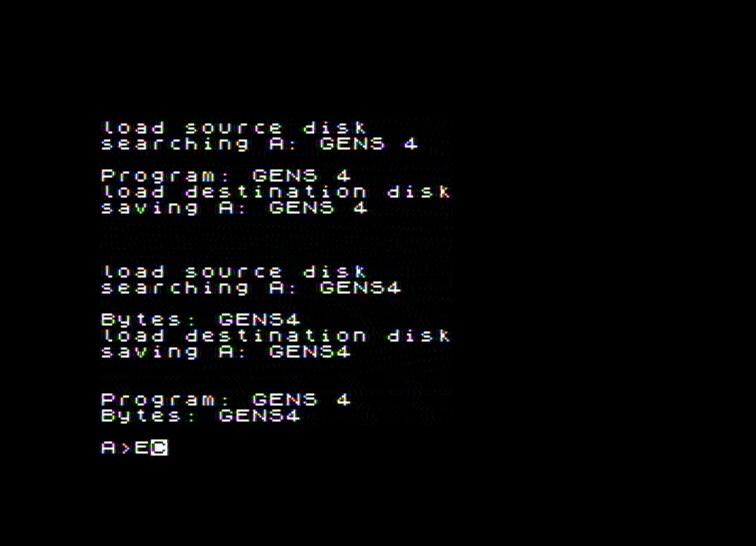
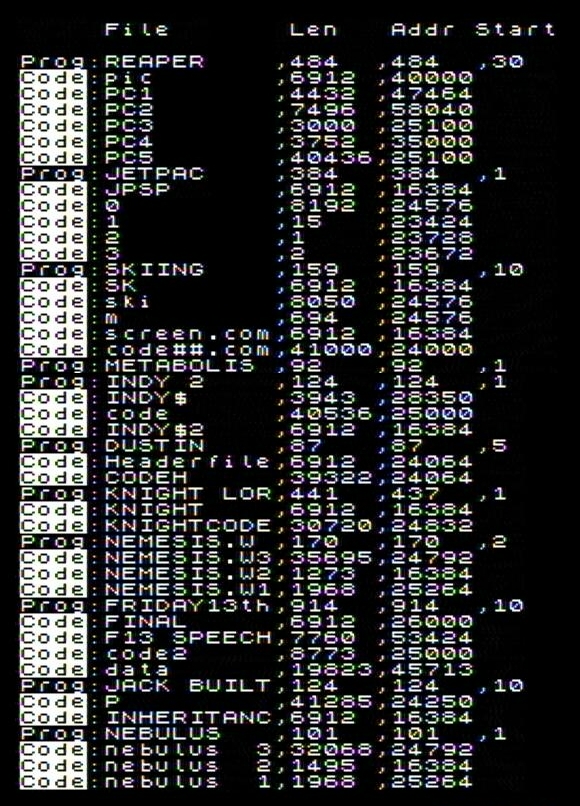
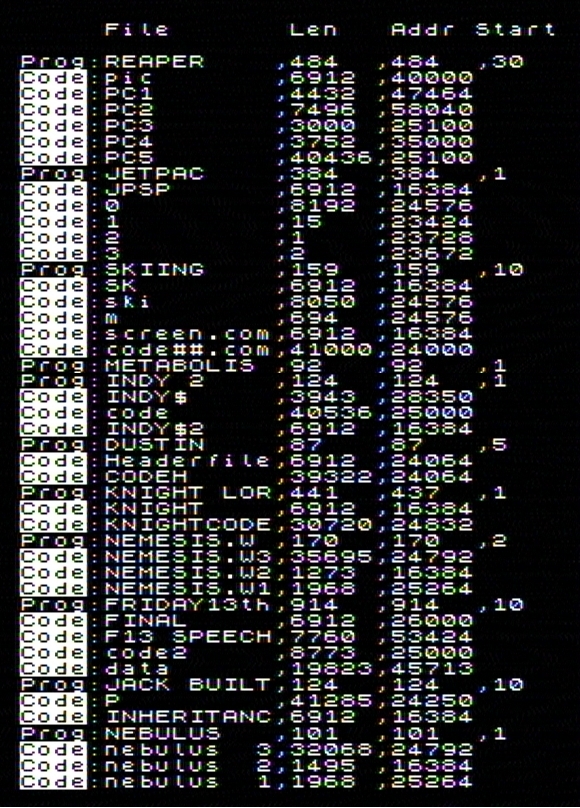
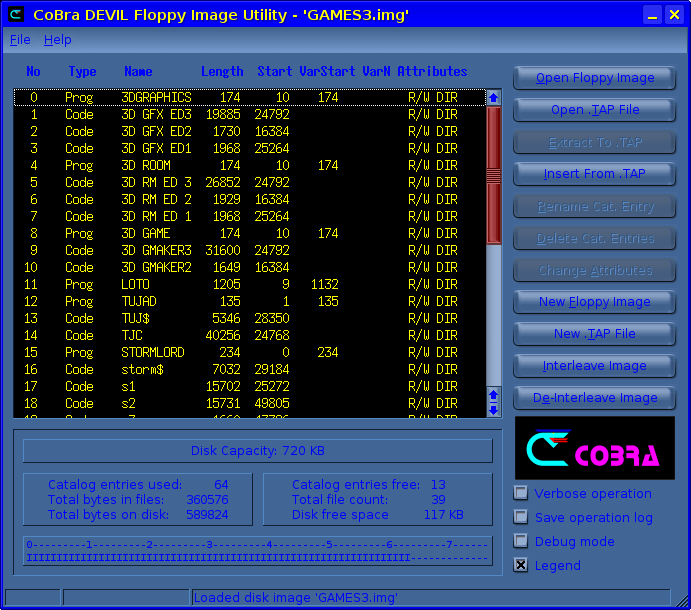
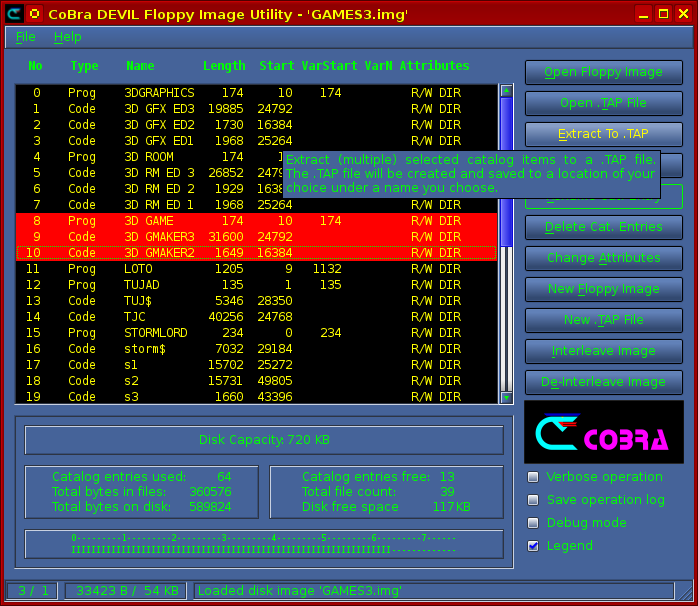
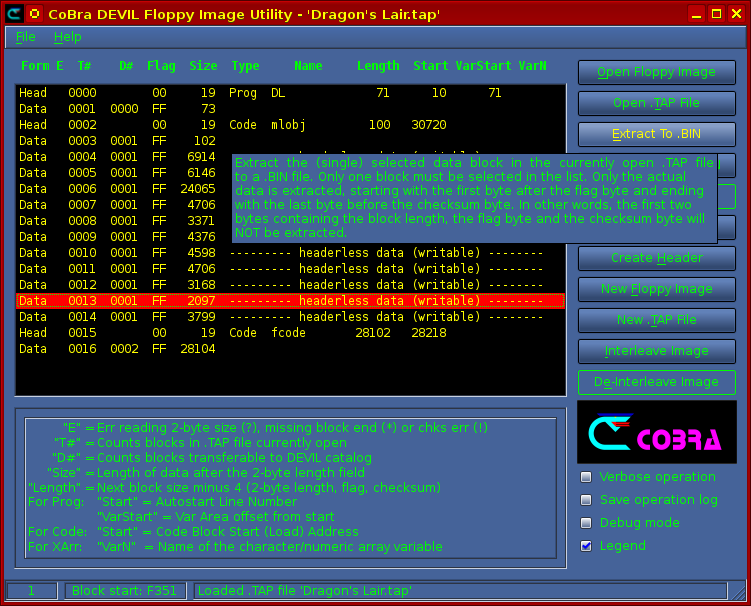
Because of the Spectrum style of storing the information on magnetic tape, data transfer from/into CoBra DEVIL floppy images (using this program) is done in .TAP format, according to the description of this format by Gerton Lunter, the author of the Spectrum "Z80" emulator. When extracting an application from a DEVIL floppy image, a block range must be specified, using the data block index in the disk catalog, displayed using the -l command (list). Therefore the floppy image contents must be listed first, using the -l command, then the -x command can be used specifying a range of data blocks that must be extracted. Usually the first block would be a "Program", followed by a few other "Code" blocks. If the first block to be extracted is displayed for instance with the index 1 and the next blocks of the same application have the indexes 2, 3, 4, 5, 6, the block range to use when extracting the apllication from the DEVIL image is "1-6". The .TAP file generated this way will have the name of the first block in the range specified, which usually is the original name of the application.
Linux utility written in Standard C for file transfer from/into Cobra DEVIL RAW floppy images (cobra-devil-diskimg-copy.c) |
| Linux graphic (Qt3) utility for data transfer from/into CoBra DEVIL floppy RAW images Downloadable archive - rev.4.9.2 MD5: daf03e7c46b092abe77263a52ae70aaa |
|
 |
 |
| Linux graphic (Qt4) utility for data transfer from/into CoBra DEVIL floppy RAW images Downloadable archive - rev.5.1 MD5: 657a0a53d512f6c5011f4ce66d236b8c |
|
 |
 |
* * *
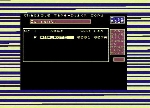
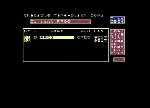
| 1. "HxCFloppyEmulator.exe" must be started (either in Microsh*t Windblows, or in Linux under Wine - obviously I ran it in Wine). A main window will be shown (see the image on the right). | .png) |
| 2. Click the "Load Raw image" button | |
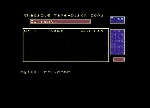
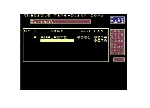
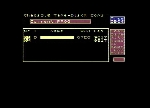
| 3. Another window will show up ("RAW File format configuration") where the formatting parameters of the original floppy disk must be entered for the RAW image to be converted (see next image on the right). In this window all required parameters will be shown with some default values. Some will have to be changed in order to match the CoBra DEVIL floppy format, as follows: | |
| 4. The "Format Value" box must be set to 229 (that is 0xE5, the DEVIL formatting byte) | .png) |
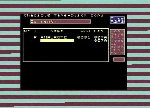
| 5. The "Sector per track" box must be set to 18. | |
| 6. The "Sector size" drop-down list must be set to 256 Bytes. | |
| 7. The "Interleave" box must be set to 2. | |
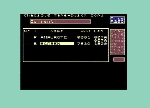
| 8. The "Auto GAP3" checkbox must be unchecked and the "GAP3 length" box set to 12. | |
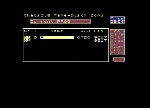
| 9. All other parameters can be left to their default values, which should look like in the image on the right. | |
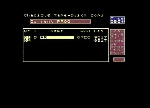
| 10. Click the "Load RAW file" button, and in the file selection dialog that shows up select the RAW image file to be converted. Then the configuration window will close and we get back to the main window. | |
| 11. In the main window click the "Export" button and choose the HFE file format as well as the name of the file to be saved with this format. | |